How to Install a Wireless Security Camera System at Home
Table of Contents
Installing a wireless security camera system at home can significantly enhance your security and provide peace of mind. Unlike wired camera systems, wireless cameras offer greater flexibility in placement and are easier to install without extensive wiring. With proper setup, these cameras help monitor key areas around your property, providing real-time alerts and video footage for improved safety. Follow this step-by-step guide to successfully install a wireless security camera system at home.
Equipment Needed
Before starting the installation, gather the necessary equipment to ensure a smooth setup process.
- Wireless Security Cameras– Choose cameras with essential features like night vision, motion detection, and HD video quality. Ensure they are compatible with your home network.
- Wi-Fi Router– A stable and strong Wi-Fi connection is crucial for uninterrupted camera functionality.
- Power Supply– Most wireless security cameras either use rechargeable batteries or a power adapter. Make sure you have the appropriate power source.
- Smartphone or Computer– You’ll need a device to install the camera’s companion app, adjust settings, and monitor live feeds.
- Mounting Hardware– Screws and other accessories required to securely install the security cameras.
Step-by-Step Guide
Step 1: Plan Wireless Security Camera System Placement
Identify Key Areas:
Determine the most critical areas to monitor, such as:
- Entrances and Exits– Front and back doors, garage, and side entrances.
- Driveways and Yards– Monitor vehicles, packages, and outdoor activity.
- Indoor Spaces– Living rooms, hallways, or areas with valuables.
Check Wi-Fi Signal Strength:
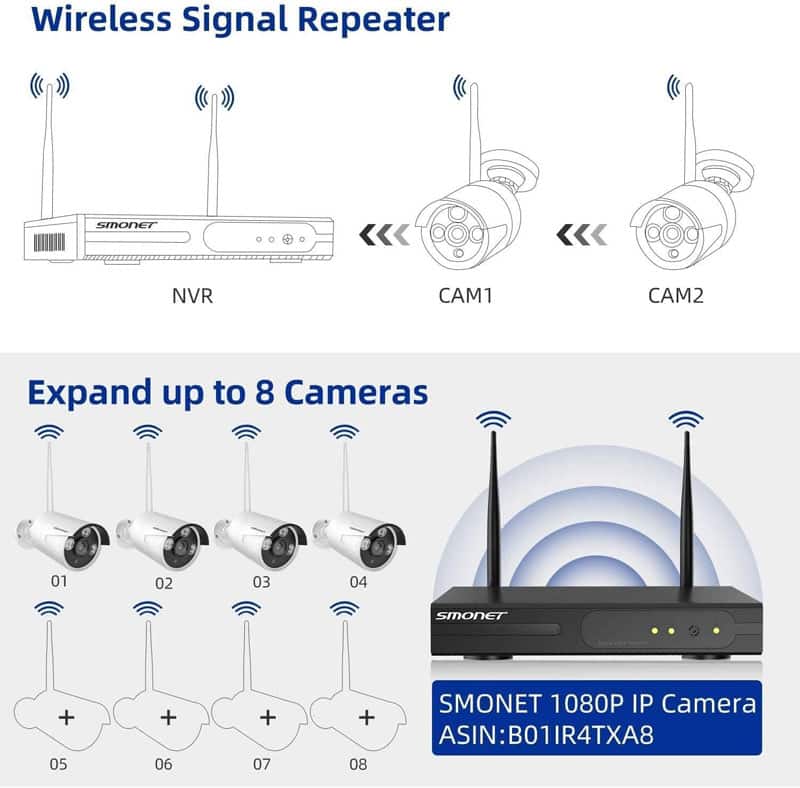
A weak Wi-Fi signal can lead to poor video quality and interruptions. Use a Wi-Fi analyzer app to test signal strength in intended camera locations. If needed, consider using a Wi-Fi extender to boost the signal.
Ensure Optimal Camera Coverage:
Make sure each camera has an unobstructed view of its designated area. Avoid placing cameras where trees, walls, or furniture may block their view.
Step 2: Prepare the Cameras
Charge or Install Batteries:
For battery powered cameras, fully charge or insert fresh batteries before setup. If using a power adapter, ensure outlets are available near installation points.
Power Up the Cameras:
Turn on the cameras and follow the manufacturer’s instructions to activate them. Some cameras may have a pairing button that needs to be pressed before connection.
Step 3: Connect Cameras to Wi-Fi
Download the Camera App:
Most wireless security camera system come with a dedicated mobile or desktop app for setup and monitoring. Locate the app on the Google Play Store or Apple App Store, download, and install it.
Create an Account:
Open the app and sign up for an account using an email address. Some apps may require phone number verification or two-factor authentication for added security.
Add Cameras to the App:
Using the app’s setup process, add each camera to your home network. This usually involves:
- Scanning a QR code provided on the camera or packaging.
- Manually entering the camera’s unique ID or serial number.
- Follow the on-screen instructions to complete the pairing process.
Connect to Wi-Fi:
Select your home’s 2.4GHz or 5GHz Wi-Fi network (based on camera compatibility) and enter the password. A strong connection ensures smooth video streaming and remote access.
Step 4: Mount the Wireless Security Camera System
Attach the Cameras:
Secure the wireless security camera system in their designated locations using the provided screws. Adjust the angles to cover the desired areas, ensuring they are positioned high enough to prevent tampering.
Test Camera Angles:
Check the live feed via the mobile app to ensure each camera captures the intended field of view. Adjust angles as needed for optimal coverage.
Step 5: Configure Camera Settings
Enable Motion Detection:
Most security cameras offer motion detection features that notify you of activity. Adjust the sensitivity settings to minimize false alarms from pets or moving branches.
Set Up Recording Options:
Choose your preferred recording method:
- Continuous Recording– Requires more storage but captures everything.
- Scheduled Recording– Records only during specific times of the day.
- Motion-Triggered Recording– Saves storage by only recording when movement is detected.
Adjust Notification Settings:
Enable push notifications, email alerts, or SMS notifications for real-time updates on security events.
Step 6: Monitor and Maintain Your System
Regularly Check Live Feeds:
Use the camera’s app to review footage and ensure cameras are functioning properly.
Monitor Battery Levels:
For battery powered cameras, check battery status through the app and recharge or replace them as necessary.
Keep Firmware Updated:
Manufacturers frequently release firmware updates to improve security and functionality. Regularly update your wireless security camera system through the app.
Additional Tips
Secure Your Wi-Fi Network
A secure Wi-Fi network prevents unauthorized access to your security system. Use a strong password and enable WPA2 or WPA3 encryption on your router.
Consider Cloud Storage
Some camera brands offer cloud storage subscriptions for storing recorded footage securely. This option ensures footage is available even if the camera is stolen or damaged.
Place Cameras Out of Reach
Install cameras at a height where they cannot be easily tampered with. Use weatherproof enclosures for outdoor security cameras to protect them from rain and dust.
Conclusion
Installing a wireless security camera system at home is a straightforward process that enhances your security while providing easy access to surveillance footage. By carefully planning placement, ensuring strong Wi-Fi connectivity, and configuring settings, you can maximize the effectiveness of your security cameras. Regular maintenance and network security measures will keep your system running efficiently, giving you peace of mind knowing your home is protected 24/7.
Prime Day OFF
Until the End
-
Master Of Cleanliness: Visual Guide To Recognizing And Understanding Your Electric Pool Cleaners
-
Making the Right Choice for A Best Keypad Door Lock: A Guide Based on Material Consideration
-
The 7 Most Common Types of Locks for Home and Office Security
-
Door Knob With Fingerprint Identification- The Future Of Home Security
-
Selecting the Ideal Digital Door Lock Style and Color for Your Abode
-
Evolution Of Security- Smart Door Key Lock
-
Mailbox Digital Lock- Reinventing Mail Security In The Digital Age
-
Exploring Alternative Unlocking Solutions - Smart Lock Fingerprint Cards and Wristbands
-
Touch Id Door Locks- Next-Generation Security At Your Fingertips
-
Why Smonet Tops The Best Cordless Pool Vacuum List

