How to Wire for Security Surveillance Cameras
Table of Contents
Wiring for wireless solar powered surveillance cameras is a crucial step in setting up a reliable surveillance system. Proper wiring ensures that your cameras receive power and transmit video signals effectively. This guide will walk you through the process of wiring security cameras, covering the necessary tools, materials, and steps involved.
1. Tools and Materials Needed
- Security cameras
- Coaxial cables (for analog cameras) or Ethernet cables (for IP cameras)
- BNC connectors (for analog cameras)
- RJ45 connectors (for IP cameras)
- Power cables or PoE (Power over Ethernet) injectors/switches
- Drill and drill bits
- Cable clips or conduit
- Wire strippers
- Screwdrivers
- Fish tape (for running cables through walls)
- Electrical tape
2. Steps to Wire Security Cameras
1) Plan Your Camera Placement
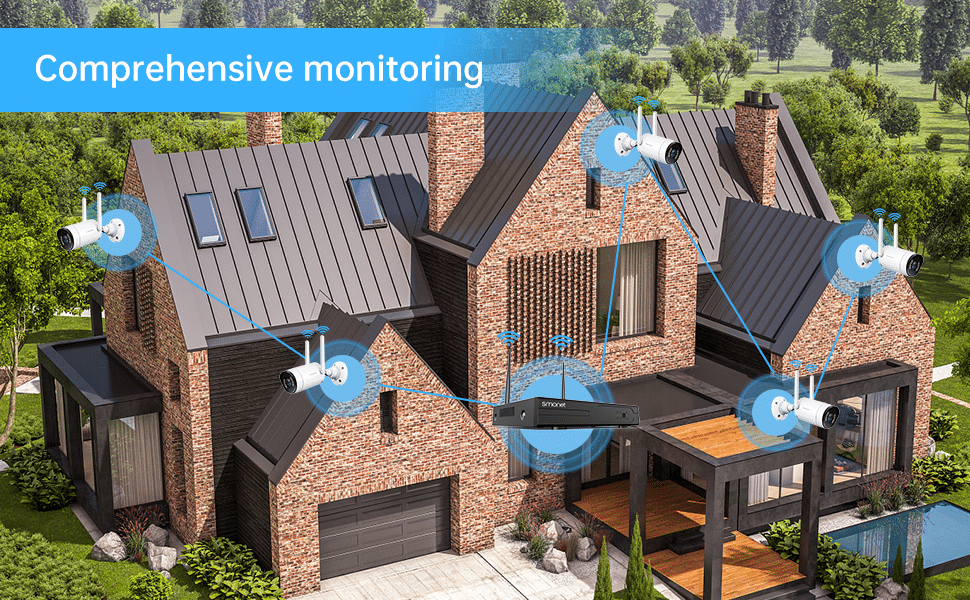
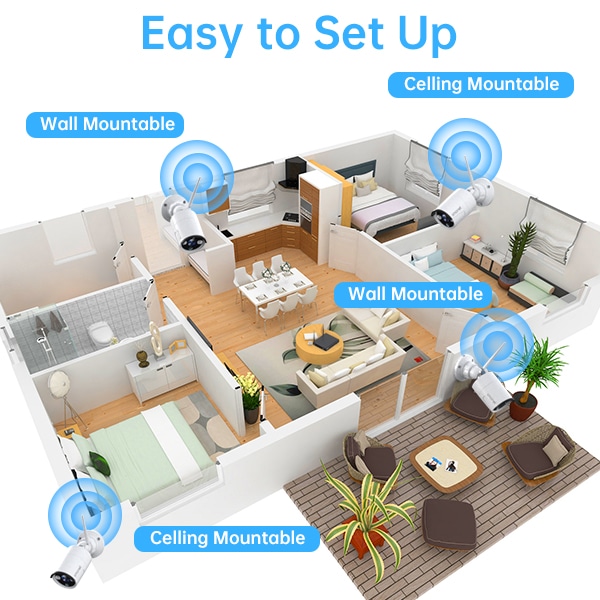
Before you start wiring, plan the placement of your solar wifi cameras. Consider the following factors:
- Determine the Number of Cameras: Identify the areas you want to monitor and decide how many cameras you need.
- Choose Camera Types: Decide between wired, wireless, or PoE (Power over Ethernet) cameras. Wired cameras require more installation work but are more reliable.
- Select Camera Locations: Choose strategic locations for your cameras to cover all necessary areas. Ensure they are placed at a height to avoid tampering and provide a clear view.
2) Run the Cables
Depending on the type of solar wifi security cameras you are using, you will need to run either coaxial cables or Ethernet cables.
(1) For Analog Cameras:
- Measure and Cut Cables: Measure the distance from each camera to the DVR and cut the BNC cables accordingly.
- Drill Holes: Drill holes in walls or ceilings to run the cables from the cameras to the DVR.
- Run the Cables: Use fish tape to pull the cables through the drilled holes. Secure the cables with cable clips or staples to prevent them from sagging.
- Connect the Cables: Attach the BNC connectors to the cables and connect them to the home surveillance cameras wireless and DVR.
(2) For IP Cameras:
- Measure and Cut Ethernet Cables: Measure the distance from each camera to the NVR or network switch and cut the Ethernet cables accordingly.
- Drill Holes: Drill holes in walls or ceilings to run the cables from the cameras to the NVR or network switch.
- Run the Cables: Use fish tape to pull the cables through the drilled holes. Secure the cables with cable clips or staples to prevent them from sagging.
- Connect the Cables: Attach the RJ45 connectors to the Ethernet cables and connect them to the cameras and NVR or network switch.
3) Drill Holes and Route Cables
Drill holes in walls or ceilings as needed to route the cables. Use fish tape to pull the cables through walls and conduit to protect the cables from damage. Secure the cables with cable clips or run them through conduit for a clean installation.
4) Connect the Cameras
Once the cables are in place, connect them to the best wireless surveillance cameras and the recording device or router.
(1) For Analog Cameras:
- Connect the BNC connector to the video output port on the camera.
- Connect the other end of the coaxial cable to a video input port on the DVR.
- Connect the power cable to the camera and plug it into a power source.
(2) For IP Cameras:
- Connect the RJ45 connector to the Ethernet port on the camera.
- Connect the other end of the Ethernet cable to a port on the NVR or router.
- If not using PoE, connect the power cable to the camera and plug it into a power source.
5) Powering the Cameras
(1) For Analog Cameras:
Connect Power Supply: Connect the power supply to the cameras using the provided power cables.
Plug into Outlet: Plug the power supply into a nearby electrical outlet.
(2) For PoE Cameras:
Use PoE Switch: Connect the Ethernet cables from the cameras to a PoE switch, which provides both power and data through a single cable.
6) Configuring the System
- Connect DVR/NVR to Monitor: Use an HDMI or VGA cable to connect the DVR/NVR to a monitor.
- Power On the System: Turn on the DVR/NVR and monitor.
- Configure Settings: Follow the on-screen instructions to configure the camera settings, such as recording schedules, motion detection, and remote viewing.
5) Test the System
After all connections are made, power on the cameras and the recording device. Check the video feed from each camera to ensure they are working correctly. Adjust the camera angles if necessary to get the desired coverage.
3. Conclusion
Wiring wireless solar powered surveillance cameras may seem daunting, but with careful planning and the right tools, you can successfully install a reliable surveillance system. Follow this guide to ensure your cameras are correctly wired and positioned for optimal security coverage. Remember to regularly check and maintain your system to keep it functioning effectively.
Prime Day OFF
Until the End
-
Master Of Cleanliness: Visual Guide To Recognizing And Understanding Your Electric Pool Cleaners
-
Making the Right Choice for A Best Keypad Door Lock: A Guide Based on Material Consideration
-
The 7 Most Common Types of Locks for Home and Office Security
-
Door Knob With Fingerprint Identification- The Future Of Home Security
-
Selecting the Ideal Digital Door Lock Style and Color for Your Abode
-
Evolution Of Security- Smart Door Key Lock
-
Mailbox Digital Lock- Reinventing Mail Security In The Digital Age
-
Exploring Alternative Unlocking Solutions - Smart Lock Fingerprint Cards and Wristbands
-
Touch Id Door Locks- Next-Generation Security At Your Fingertips
-
Smonet Home Door Lock- The Future Of Home Security

